Using DLC-live#
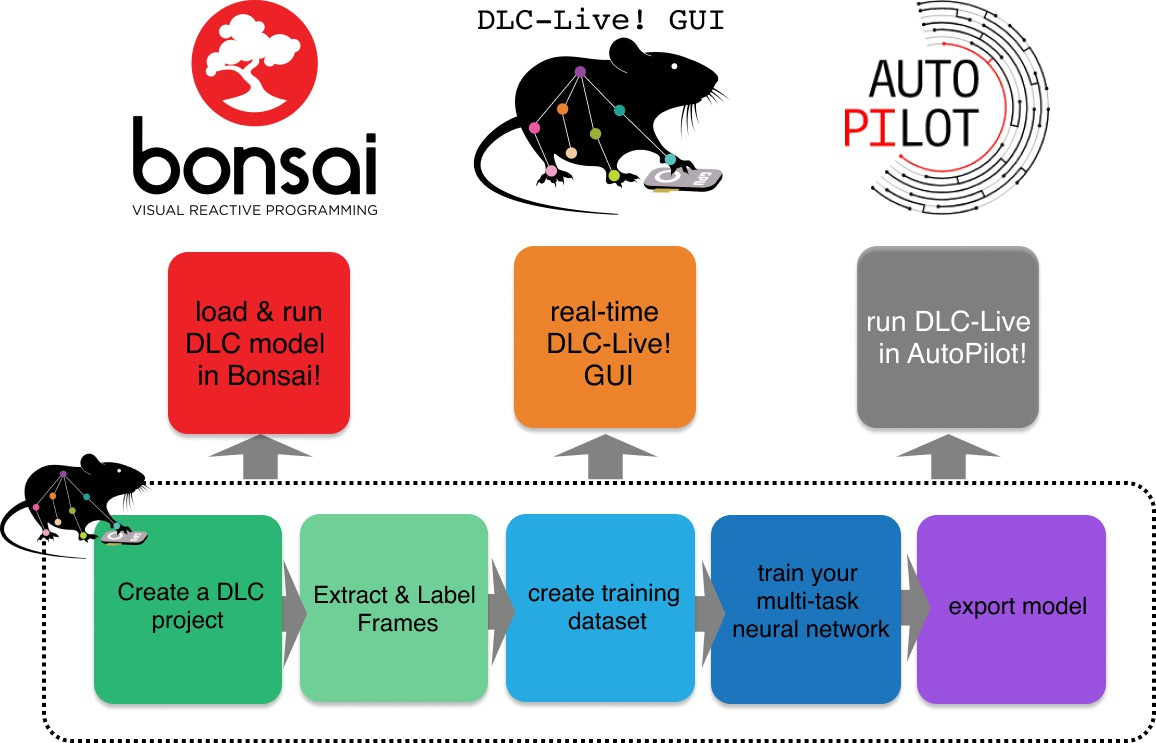
Currently there are four different ways to incorporate DLC-live! into an experimental design:
DLC-live SDK can be used as is in Python, running custom-written scripts to read video data, estimate pose, and interface with the Python APIs for commonly used hardware (Arduino and Teensy microcontrollers, National Instruments devices, Raspberry Pis).
DLC-live GUI provides a graphical user interface to record videos and perform pose estimation without any additional coding. Note that implementation of closed-loop feedback will still require some scripting tailored to the particular application.
Bonsai-DLC allows easy integration of DLC-based pose estimation into Bonsai experimental control workflows. Find out how Bonsai works in its original technology report and learn about its current capabilities on the Bonsai website!
Autopilot-DLC integrates DLC-live! into Autopilot-based control workflows. Check out the Autopilot whitepaper to learn more about the platform.

Fig. 2 Overview of using DLC networks in real-time experiments within Bonsai, the DLC-Live! GUI, and AutoPilot from Kane et al, eLife 2020.#
Note
How can you reach sub-zero latency when providing feedback in a behavior experiment? For what behaviors is this possible, and for which behaviors is it rather impossible?
Getting started#
The FIRST STEP is to install the DLC-live! pip package.
If you wish to use the DLC-live! GUI, follow these installation instructions. Note that it requires Python 3.5, 3.6, or 3.7, but do not worry if your CUDA setup is not compatible with TensorFlow (TF) 1.13. You can use Tensorflow 2.x as long as you choose Python 3.7.
For other implementations of DLC-live! on Windows or Linux machines, run the following in your DLC environment or create a dedicated environment as described here. DLC-live! works with both TF1.x and TF2.x!
pip install deeplabcut-live
You can test your installation by running dlc-live-test. Have a look at the DLC-live! codebase to see what this test does!
To run DLC-live! on an NVIDIA Jetson Development Board, check out this guide.
The SECOND STEP is to export your DLC model of interest or choose a model from the DeepLabCut ModelZoo.
To export your own well-trained single-animal model to a Protocol Buffers (.pb) format, run:
deeplabcut.export_model(cfg_path, iteration=None, shuffle=1, trainingsetindex=0, snapshotindex=None, TFGPUinference=True, overwrite=False, make_tar=True)
You should now see an exported-models folder in your DLC project directory.
Check out the DLC-live! codebase to see how you can benchmark and analyse your exported DLC models!
How to use DLC-live! on its own?#
To launch and use the DLC-live! GUI, follow the detailed instructions at the DeepLabCut-live-GUI codebase.
If you wish to build your own custom software with DLC-live!, check out the DLC-live SDK quick-start guide and code!
In either case, this guide on the Processor class and code examples applying it to communicate with Teensy microcontrollers will be especially helpful for building closed-loop experiments.
How to use Bonsai-DLC?#
If you are new to Bonsai, follow these instructions to install Bonsai on a Windowso or Linux machine.
Assuming that you already have DLC-live! (and ideally CUDA/TF for GPU support) set up, hook it up with Bonsai by:
downloading the
Bonsai.DeepLabCutandBonsai.DeepLabCut.Designpackages from Bonsai Tools -> Manage packages;downloading a suitable (OS- and CPU/GPU-dependent) precompiled TF binary from the TF website;
copying the
tensorflow.dllfile from the downloaded and extracted TF binary folder to theExtensionsfolder of your Bonsai installation. You can locate your Bonsai install folder by right-clicking on your Bonsai shortcut, selecting Properties and copying the path under “Start in”.
For more information on the motivation and installation of Bonsai-DLC, and its source code, visit the Bonsai-DLC github page.
As an example, let’s see how Bonsai-DLC can be used to control the frequency of a tone based on the Y coordinate of a particular body part.

Fig. 3 An example Bonsai workflow using DLC-live pose estimation to control audio frequency.#
insert a
FileCapturesource to play a pre-recorded video (for example, the dog video used by DLC-live-test or a recorded experiment) or an appropriate camera source, such asCameraCaptureif you use a webcam, to stream live video. To use other cameras (Basler, FLIR, Vimba), you can find the necessary Bonsai package by browsing Tools -> Manage packages or the github repository.set the path to your video file or initialise your camera by editing the properties of your source node
insert a
PredictPosetransform node from the DLC packageset the
ModelFileNameproperty to the path of your exported.pbfile and thePoseConfigFileNameproperty to the path of yourpose_cfg.yaml; these could be from the full_dog model of the DLC Model Zoo like in the DLC-live-test!insert a
GetBodyPartnode and set itsNameproperty to the label of the body part you wish to use for closed-loop controlright-click on the
GetBodyPartnode and selectOutput (Bonsai.DeepLabCut.BodyPart)->Position (OpenCV.Net.Point2f)->Y (float)– this will output a stream of Y coordinates of your selected body part(optional) insert an
ExpressionTransformnode to map the expected range of your coordinates onto a range of sound frequencies; for example, to change the range of values from [200,400] to [100,900], set theExpressionproperty of this node to100+(4*(it-200))insert a
PropertyMappingnode followed by aFunctionGeneratornodeclick on the three dots next to the
PropertyMappingsproperty of thePropertyMappingnode (this will open a PropertyMapping Collection Editor), click Add -> PropertyMapping and select ‘Frequency’ as propertyNamestill in the PropertyMapping Collection Editor, click on the three dots next to
Selector(this will open a Member Selector Editor), click onSource (float)and then>, which will move the input float (it) to the right-side panelclose the two editors by clicking ‘OK’
(optional) set the
Amplitudeproperty ofFunctionGeneratorto 800 (for example) to increase the sound volumeinsert an
AudioPlaybacksink node to play the sound wave produced byFunctionGenerator
Play the workflow by clicking ‘Start’ in the top panel. You can double-click on any node to visualise what it is doing. Try this for the PredictPose and Position Y nodes – the workflow will likely take a few seconds to initialise, so the visualiser windows will be blank at first.
For general Bonsai support, check out the community google group or github discussions.
How to use AutoPilot-DLC?#
Have a look at the AutoPilot documentation and an example notebook on the AutoPilot github page.
Return to readme.
